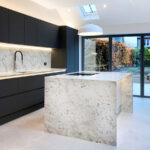
Ever looked at your timber floors and felt they’ve seen better days? Floor Sanding and Polishing could be the magic your floors need. Especially in Sydney, where stylish homes and apartments are the norm, giving your floors a facelift can completely transform your space. Whether you’re preparing for a home sale or just love that polished, classy look, this guide will walk you through everything you need to know about floor sanding and polishing.
What is Floor Sanding and Polishing?
What is Floor Sanding?
Floor sanding is the process of removing the top surface of a wooden floor by sanding it down with abrasive materials. Think of it as giving your floor a deep exfoliation. Over time, scratches, dents, and general wear and tear can leave your timber floor looking dull and uneven. Sanding smooths it all out, revealing the fresh wood underneath.
What is Floor Polishing?
Once the floor is sanded, it’s time to polish. Polishing involves applying a finish that protects the floor and gives it that beautiful glossy or matte appearance. It’s the final touch that brings your floors to life and locks in that fresh-from-the-showroom feel.
Why You Should Consider Floor Sanding and Polishing
Improves Aesthetic Appeal
Nothing beats the charm of freshly polished timber floors. They reflect light better, feel smoother underfoot, and simply look stunning.
Increases Property Value
First impressions matter, especially in real estate. Potential buyers often notice flooring first. A newly polished floor can boost your home’s market value and appeal.
Extends Floor Life
Sanding removes surface damage, while polishing protects it from future wear. It’s like giving your floor a second life.
Types of Floors That Can Be Sanded and Polished
Hardwood Floors
Solid hardwood floors like oak, maple, and ash are perfect candidates. They can handle multiple sandings over the years.
Timber Floors
Timber is a classic flooring material in Australian homes. It handles sanding well and finishes beautifully.
Parquet Flooring
Though intricate, parquet can also be sanded and polished to restore its detailed design.
Bamboo Flooring
Yes, bamboo can be sanded and polished too, though it requires a gentler touch.
The Floor Sanding Process
Step-by-Step Breakdown
- Inspection – Assess the condition of the floor.
- Preparation – Remove furniture and fix any protruding nails.
- Initial Sanding – Start with coarse grit to remove old finish.
- Fine Sanding – Use finer grits to smoothen the surface.
- Clean-up – Vacuum and wipe down to remove dust.
Equipment Used
- Drum Sander
- Edge Sander
- Orbital Sander
- Sandpaper (Various Grits)
- Industrial Vacuum
The Floor Polishing Process
Choosing the Right Finish
There are several finishes available:
- Glossy – Shiny and reflective.
- Satin – Slightly shiny, less glare.
- Matte – Natural and subtle look.
Step-by-Step Polishing Guide
- Apply the first coat of polish with a brush or roller.
- Allow to dry as per product instructions.
- Light sanding between coats for smoothness.
- Apply the second and possibly third coat.
- Let it cure for at least 24–48 hours.
How to Prepare Your Home for Floor Sanding and Polishing
Clear the Area
Move out all furniture, rugs, and decor. The space needs to be empty for effective sanding.
Check for Repairs
Fill in gaps, fix creaky boards, and secure loose nails.
Ventilation Tips
Keep windows open to help with dust and fumes. Use fans to circulate air.
How Long Does It Take?
Project Timeline Breakdown
- Preparation: 2–4 hours
- Sanding: 1–2 days depending on size
- Polishing: 1–2 days
- Curing: 1–3 days
A typical job in Sydney takes about 3–5 days in total.
Cost of Floor Sanding in Sydney
Average Cost per Square Meter
In Sydney, expect to pay: floor sanding sydney
- $25–$40 per square meter for sanding
- $10–$20 per square meter for polishing
Factors That Affect Pricing
- Floor size
- Floor condition
- Type of timber
- Number of polish coats
- Stairs or tricky areas
Common Mistakes to Avoid
Over-sanding
Removing too much wood can reduce the floor’s life span.
Ignoring Floor Condition
Sanding over damaged boards only makes it worse.
Choosing the Wrong Finish
Some finishes don’t suit certain woods or lifestyles (e.g., pets and kids).
DIY vs. Hiring a Professional
Pros and Cons of DIY
Pros:
- Cost-saving
- Learning experience
Cons:
- Time-consuming
- Risk of damage
- Uneven sanding or polishing
Benefits of Hiring Floor Sanding Sydney Experts
- Expertise and precision
- Professional equipment
- Clean finish
- Warranty or service guarantee
Choosing the Best Floor Sanding Sydney Service
What to Look For
- Years of experience
- Customer reviews
- Before and after portfolio
- Insurance and certifications
Questions to Ask
- What finishes do you use?
- How long will the job take?
- Do you offer a warranty?
- Is the process dustless?
Floor Maintenance Tips After Polishing
Cleaning Tips
- Use a damp (not wet) mop
- Avoid harsh cleaners
- Use floor pads under furniture
When to Re-polish
You may need a new polish every 3–5 years, depending on foot traffic and wear.
Eco-Friendly Floor Sanding Options
Dustless Sanding
New technology offers almost dust-free sanding. Great for people with allergies or asthma.
Low-VOC Finishes
Volatile Organic Compounds (VOCs) can be harmful. Low-VOC options are safer and better for indoor air quality.
Conclusion
Floor sanding and polishing isn’t just about looks—it’s about giving your floors a fresh lease on life. Whether you’re restoring old timber or just refreshing modern hardwood, this process adds durability, beauty, and value to your Sydney home. From choosing the right finish to understanding the full process, we hope this guide has given you everything you need to take that next step with confidence.